Shooting the Perseids
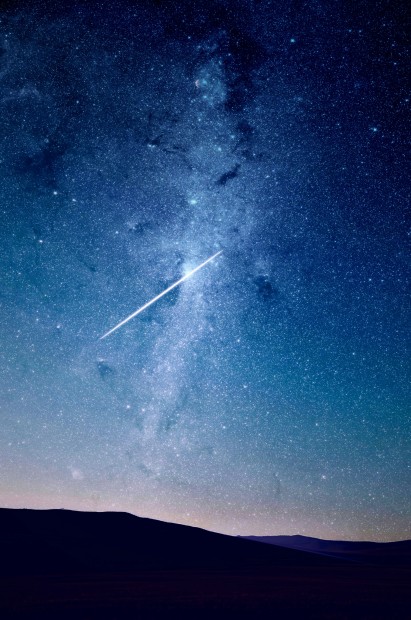
Shooting the Stars: How to Photograph the
Perseid Meteor Shower
Your ultimate, jargon-free guide to capturing magical shooting stars this August!
Has the Eclipse got you thinking of photographing things a little more extraterrestrial?
August isn't just the month of lazy warm evenings, ice cream, and BBQ. It is also the best time to view the most dazzling annual celestial light
show of the year: the Perseid meteor shower! If you’ve ever looked up at a clear summer sky, watcheda streak of glowing light zip overhead, and thought, "I wish I could capture that on camera," we have
some fantastic news for you.
Photographing shooting stars sounds like something reserved for high-tech labs deep in the
Atacama Desert, right? Wrong! In fact, astrophotography has never been more accessible. You don't
need a telescope the size of a rocket laucher or a degree in astrophysics. With just a few basic bits of kit
and a sense of adventure, you can snap breathtaking images of cosmic debris burning up in our
atmosphere.
Grab a flask of tea, pull up a garden chair, and let’s dive into how easy it is to photograph the Perseid
meteor shower with a little help from your friends here at Castle Cameras!
1. Location, Location, Location (Escape the Light Pollution)
First things first: city lights are the mortal enemy of stargazing. To see and photograph meteors clearly,
you want to get away from streetlamps, glowing car parks, and town centres.
Pack up the car and head out to your local dark sky spot—think National Parks, coastal cliffs, quiet
countryside lanes, or even a wide-open local golf course. Not only will you dodge light pollution, but you’ll
also get a wonderful dose of fresh night air and peace and quiet.Top Tip: Give your eyes about 20 minutes to adjust to the dark once you arrive. Leave the phone
screen scrolling in your pocket—blinding yourself with white light ruins your precious night vision!
2. Gear Up: What Do You Actually Need?
Here is the best-kept secret in night sky photography: you don't need an astronomical budget. Any
modern interchangeable lens camera (DSLR or mirrorless) or even an advanced bridge camera will do a
marvellous job. However, nailing that perfect streak of light comes down to having the right support
system.Essential Kit Available at Castle Cameras
Sturdy Tripods: Because you’ll be using longer exposure times (leaving the shutter open for
seconds at a time), any wobble will turn your stars into blurry squiggles. A rock-solid tripod is
your absolute best friend.
Wide-Angle Lenses: The wider, the better! Lenses like a 16-35mm or a nifty 14mm prime let
you capture a massive sweep of the night sky, drastically increasing your chances of catching a
rogue meteor streaking across the frame.
Shutter Releases / Intervalometers: Avoid touching the camera body when taking a photo
(which causes camera shake). A cable release or remote shutter allows you to trigger shots
hands-free. Better yet, set an intervalometer to take continuous photos while you sit back and
watch the show!
Spare Batteries & Memory Cards: Cold night air drains batteries faster than you'd expect, and
shooting lots of long exposures eats up card space. Always pack spares!3. Camera Settings: Keep It Simple!
Don't panic about complex manual formulas. Astrophotography is essentially a fun experiment with three
simple settings:
Manual Focus (MF): Switch your lens to manual focus. Find the brightest star or distant light
source on the horizon, zoom in on your LCD screen, and twist the focus ring until that star is a tiny,
pin-sharp point. Once set, tape the focus ring down with a bit of gaffer tape so it doesn't
accidentally budge!
Wide Open Aperture: Set your aperture to its lowest possible number (e.g., f/2.8 or f/4) to let as
much starlight flood into the sensor as possible.
High ISO: Crank your ISO up to somewhere between 1600 and 6400 so your camera's sensor
becomes extra-sensitive to faint light.
Shutter Speed (The 500 Rule): Set your shutter speed to around 15 to 20 seconds. Any longer,
and the rotation of the Earth will turn your stars into little trails (unless you want star trails, but for
meteors, pin-sharp stars look best!).
4. Frame, Shoot, and Repeat!
Once your camera is locked onto your sturdy tripod and pointed toward the darkest part of the sky (the
Perseids appear to radiate from the constellation Perseus, but meteors can flash anywhere across the
heavens), set your camera to take continuous exposures.Then... sit back, relax, and let the camera do the hard work. You might capture ten blank frames, then
suddenly—bam!—a bright green or orange streak flashes across exposure number eleven. That
addictive thrill is what astrophotography is all about!Castle Cameras Pro-Tip: Don't panic if your test shots look a little dark or grainy straight out of the
camera. A quick tweak to contrast and highlights in editing software later on will bring out the Milky
Way backdrop and make those shooting stars pop!Pop Into Castle Cameras Today!
Ready to capture the cosmos this August? Whether you need advice on picking your first wide-angle
lens, want to test out a heavy-duty tripod in-store, or need extra batteries before heading out under the
stars, our friendly team at Castle Cameras is here to help you every step of the way.
Drop by our stores or explore our range online. Clear skies and happy shooting!-
Posted by Luke
11th August 2026